


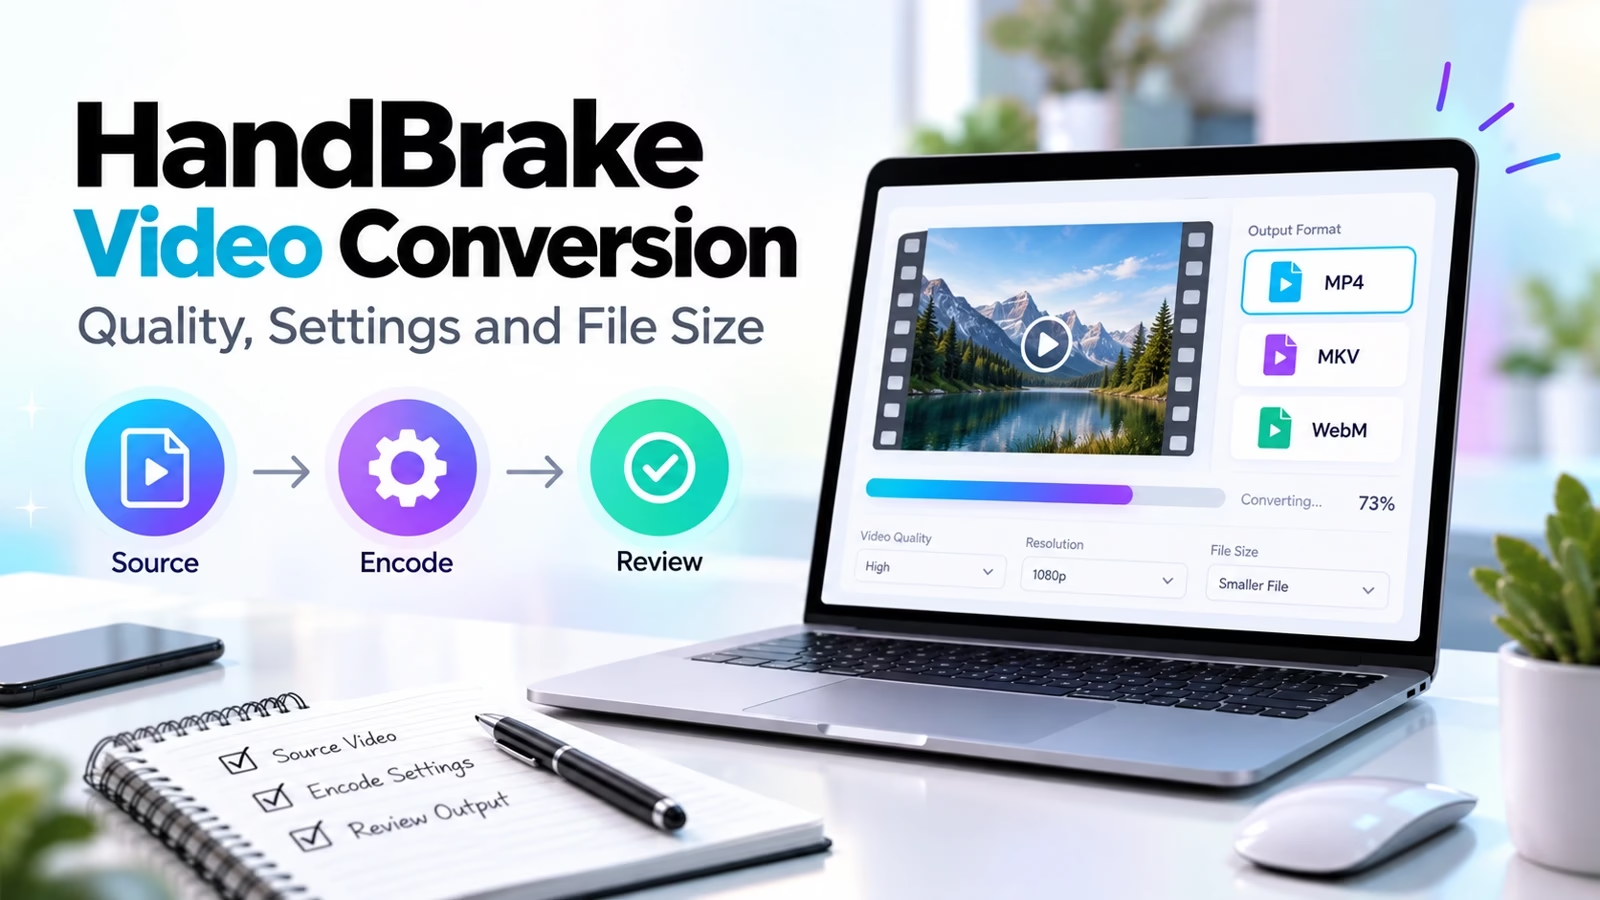

HandBrake is the free, open-source video transcoder we reach for when a file is too big to send, in the wrong format, or built for a device it will never meet again. It runs on Windows, Mac and Linux, costs nothing, and converts video from nearly any format into modern, widely supported codecs.
The catch is that HandBrake hands you real controls. Pick the wrong ones and you get a blurry mess or a file bigger than the one you started with. Pick the right ones and a 4 GB recording shrinks to 400 MB with no visible difference.
This guide walks through the settings that actually matter: presets, containers, codecs, the quality dial, and the knobs that move file size. Every screenshot below comes from HandBrake’s official documentation, and every fact is checked against the official docs and release notes.
The settings we recommend, at a glance
If you only have two minutes, this table is the whole article. These are the combinations we use most often, and the reasons behind each one.
| Job | Preset or encoder | Quality | Container |
|---|---|---|---|
| Everyday shrinking for sharing | Fast 1080p30 | RF 22 | MP4 |
| Best size-to-quality for a library | H.265 (x265) | RF 24 | MP4 or MKV |
| Archiving a master copy | Preservation FFV1 | Lossless | MKV |
| Editing later in a pro editor | Production ProRes | HQ | MOV |
| Fastest possible encode | Hardware encoder (NVENC, QSV, VCN, VideoToolbox) | CQ 24-26 | MP4 |
| Small file for chat or web | Social 10MB preset | Auto | MP4 |
The rest of the guide explains why these work and when to break the pattern. If you want more software picks after this, our best video editing apps roundup covers the editing side of the workflow, and the creator apps we recommend fill in the rest of a content toolbox.
Install it, open it, load a video
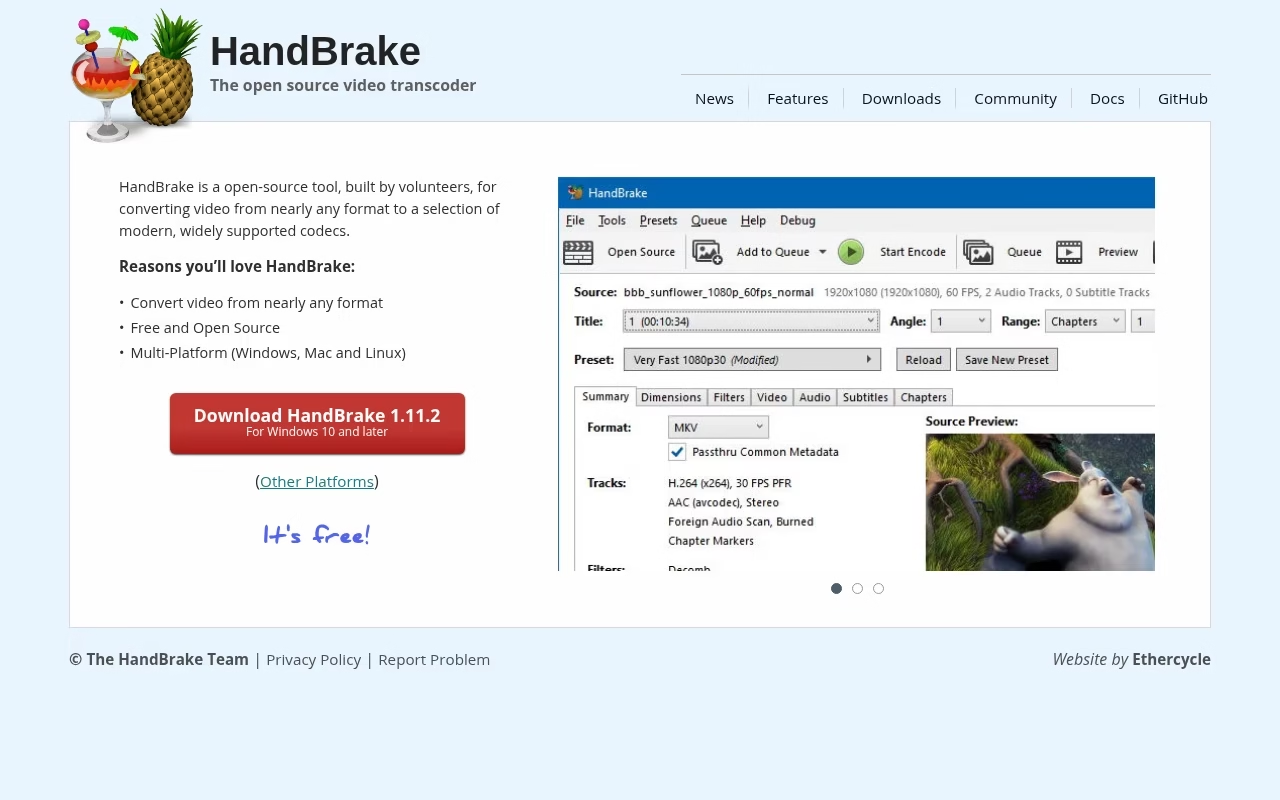
Download HandBrake only from the official site at handbrake.fr. The current release is version 1.11.2, published in June 2026. Builds exist for Windows 10 and later, macOS, and Linux, and the whole thing is free under the GPL license. It has held a permanent spot in our apps directory for years.
Windows users should know one new requirement: from version 1.11 onward, the app needs the Microsoft .NET Desktop Runtime 10.0 installed. If HandBrake refuses to launch after an upgrade, that missing runtime is almost always the reason.

Opening a video is one click on the Open Source button, or a drag and drop onto the window. HandBrake scans the file, reads its tracks, and fills in the summary panel. That instant read-out of tracks and chapters is one reason it stays near the top of our ranked lists.
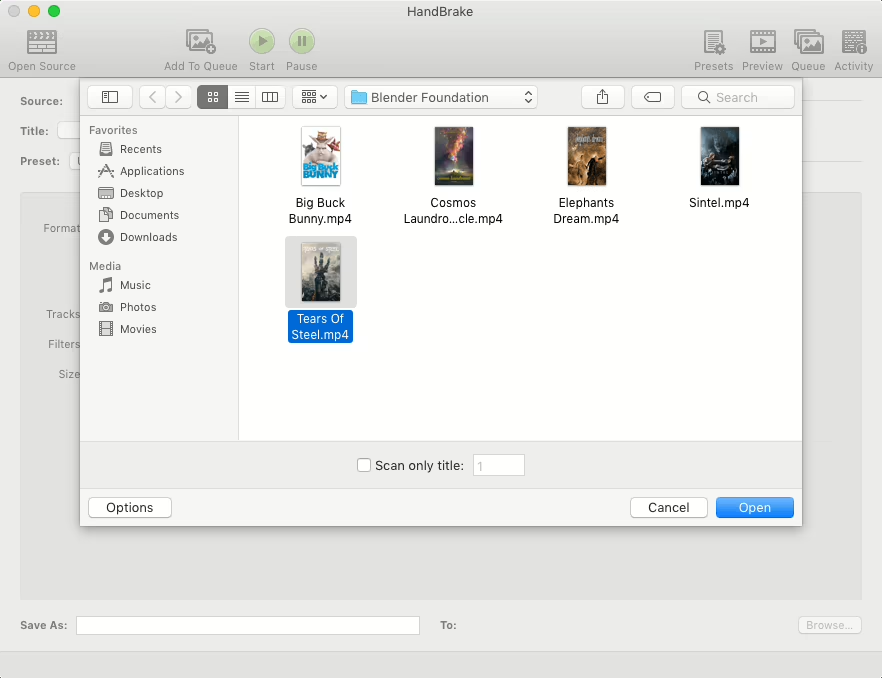
Point it at a folder instead of a single file and it treats the folder as a batch source. That is the start of bulk conversion, which we cover in the queue section below.
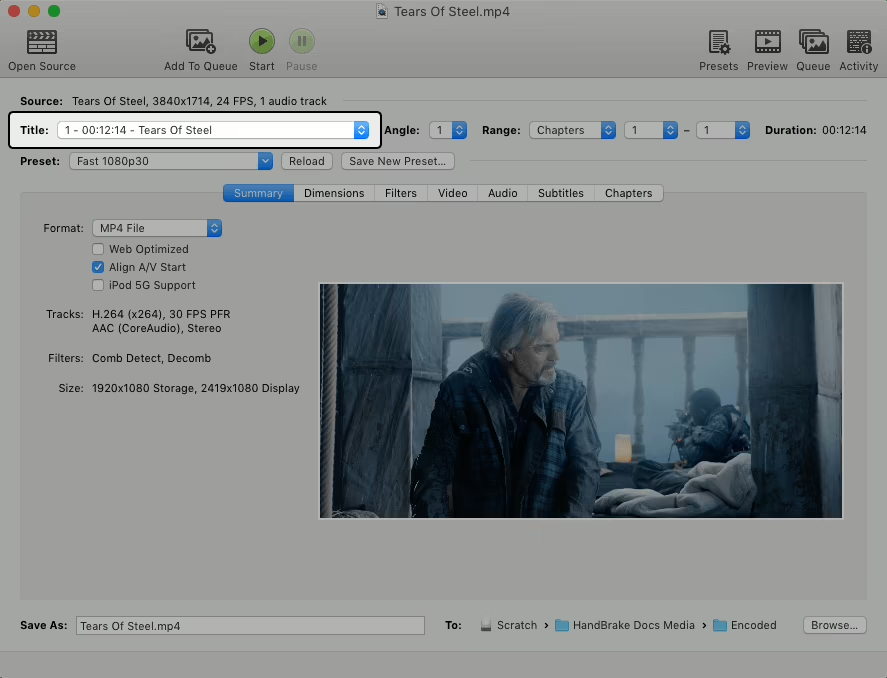
One scan detail matters: discs and multi-title files. A DVD or Blu-ray folder contains many titles, so pick the one you want from the Title dropdown before touching anything else.
Start from a preset, not from zero
The Preset menu is the single most important control in the app. It bundles a codec, a resolution cap, a frame rate, a quality level and audio settings into one named choice.
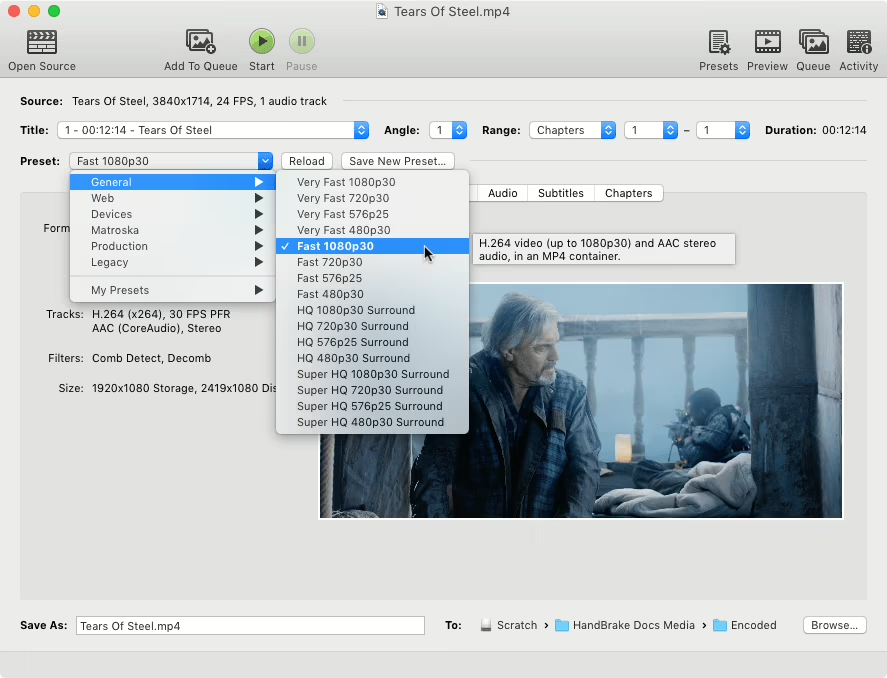
The categories break down like this:
- General: Fast, Very Fast, HQ and Super HQ at common resolutions. This is home for 90 percent of jobs. Very Fast 1080p30 is the default and a perfectly good default.
- Web: tuned for online playback, including the small Social 10MB presets added in version 1.10 for chat apps with size caps.
- Devices: profiles for specific hardware like Roku boxes, game consoles and Chromecast.
- Matroska: the same speed ladder, but writing MKV files instead of MP4.
- Production: new in 1.11. ProRes and DNxHR presets in MOV, meant for footage headed into a professional editor.
- Legacy: older profiles kept for compatibility.
Our rule: pick the General preset that matches your source resolution, encode one minute of it, and only then start adjusting. Presets are a floor, not a ceiling. We take the same start-from-a-good-default approach in our photo editing software picks.
If you build a combination you like, Save New Preset stores it under My Presets. Back those up before a version upgrade, since the release notes warn that old custom presets may not carry over cleanly.
Containers and codecs: pick the pair, not just the file extension
People say “convert it to MP4” as if that settles everything. It settles the container, which is just the box. The codec is what actually compresses the video inside that box.
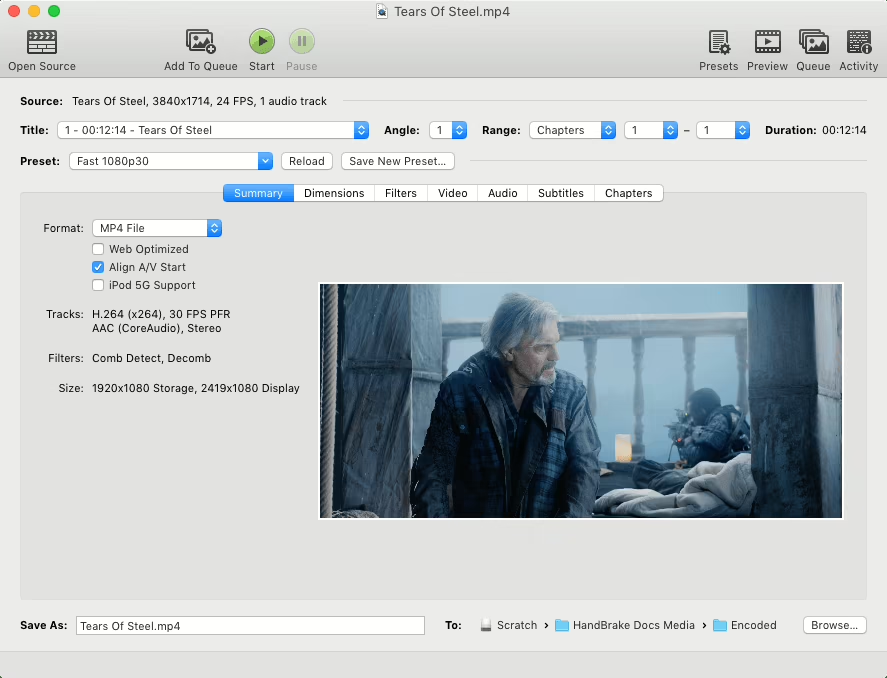
HandBrake writes four containers: MP4, MKV, WebM, and MOV, which arrived in version 1.11. For sharing, use MP4 because everything plays it. For archiving with lots of tracks, MKV is the more flexible box.
If graphics rather than video is the job, our vector image software guide covers that side of media work.
How to choose among them:
- H.264 plays on every device made in the last fifteen years. It is the safe default and the reference point for every quality comparison.
- H.265 delivers the same visible quality at roughly half the bitrate. Encoding takes longer, and very old players may choke on it.
- AV1 squeezes files even smaller and is royalty-free. Software AV1 encoding is slow unless you have a newer GPU.
- ProRes and DNxHR are production codecs: huge files, gentle compression, made for editing rather than watching.
- FFV1 is mathematically lossless. Use it for masters you will re-encode later, not for files you plan to watch. Masters that size belong in a real backup plan; our incremental vs differential backup guide compares the two main strategies.
Hardware encoders trade quality for speed
HandBrake can also use the encoder chip inside your GPU: NVENC on NVIDIA cards, Quick Sync on Intel chips, VCN on AMD cards, and VideoToolbox on Apple hardware. Version 1.11 added an AV1 VCN 2160p preset for AMD 9000-series GPUs.
A hardware encode can run several times faster than software. The cost is quality: at the same file size, a hardware H.265 encode looks a notch softer than x265, because the fixed-function chips spend fewer decisions per frame. For a quick phone-bound clip, take the speed. For an archive copy or anything headed to a big TV, let the CPU work and use the time to your advantage.
One Windows note: 1.11 removed Intel HyperEncode support because Intel deprecated it upstream, so paired-GPU encoding is gone for now. Creators running long batches every day tend to build a wider stack around the encoder; our creator apps roundup maps that toolbox.
The RF dial: the one number that controls everything
Open the Video tab and the most important control is Constant Quality, marked RF. It stands for rate factor, and it works backwards from what most people expect: lower numbers mean higher quality and bigger files.
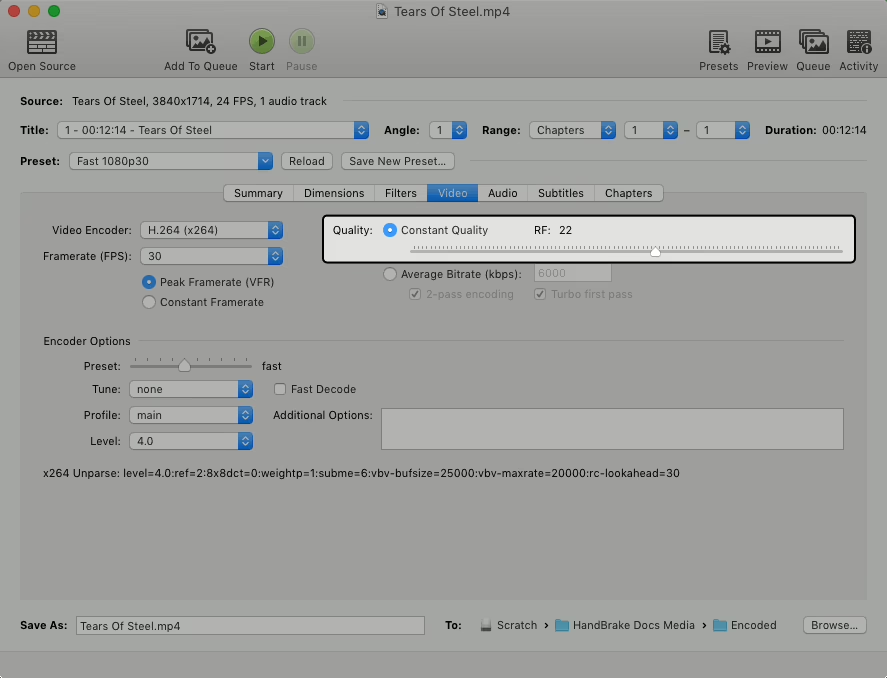
RF 0 is mathematically lossless and produces absurd file sizes. The sane zone for x264 sits between 18 and 28, and the official docs suggest treating the preset default, usually 22 or 23, as the middle of that zone.
One-minute samples cost almost nothing, so never tune blind. Our how we rank companies page describes the checks we run before recommending any tool.
Start at the preset default. Encode one chapter or one minute as a test.
Watch it on the screen that will actually play the file. If you see blockiness in dark scenes, drop RF by 2. If the file feels heavy, raise it by 2.
Adjust in steps of 1 to 3. Small RF moves change file size more than most people expect, so big jumps overshoot fast.
For x265 and AV1, add about 2 to 4 to your x264 number. The encoders are tuned differently, so RF 24 in x265 roughly matches RF 22 in x264 for visible quality.
Quality mode versus bitrate mode
The alternative on the Video tab is Average Bitrate, where you set the size directly, like 5,000 kbps. Use it only when a platform or device imposes a hard bitrate limit. Constant Quality gives better-looking results for the same size in almost every other case.
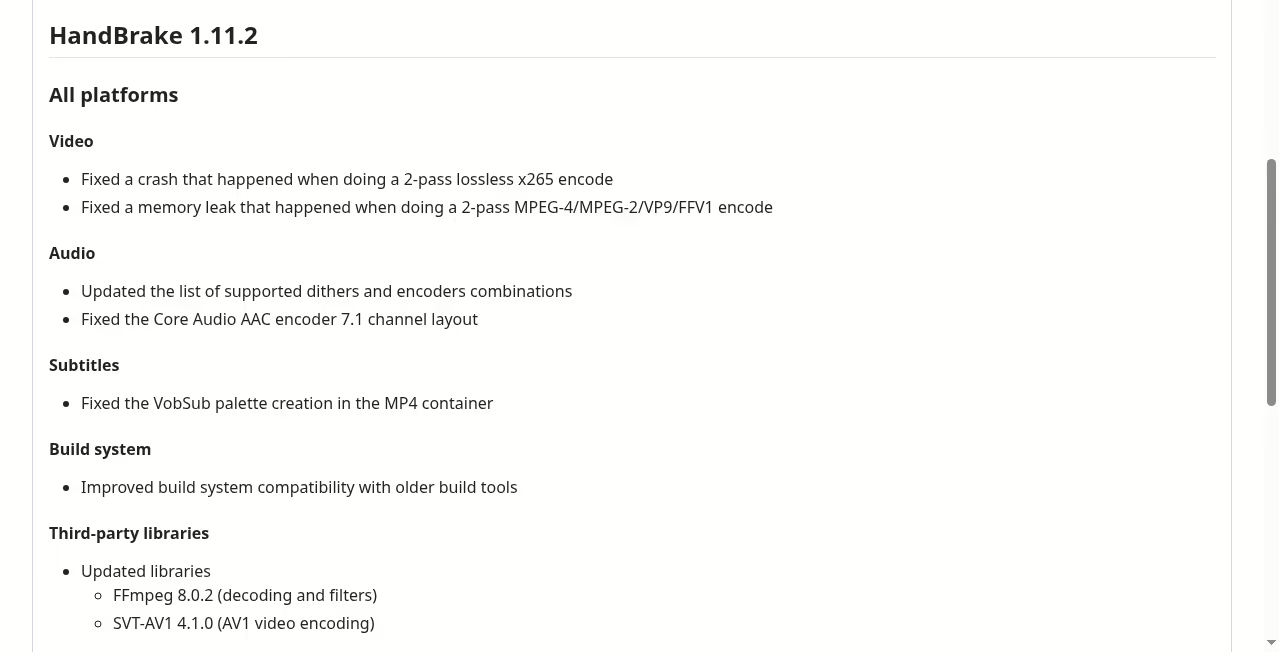
If you do use bitrate mode, tick 2-Pass Encoding. The first pass maps where the complex scenes are, and the second pass spends the bitrate budget accordingly. Version 1.11.2 fixed crashes and memory leaks in two-pass lossless x265 and two-pass MPEG-4, MPEG-2, VP9 and FFV1 encodes, so the mode is in good shape now.
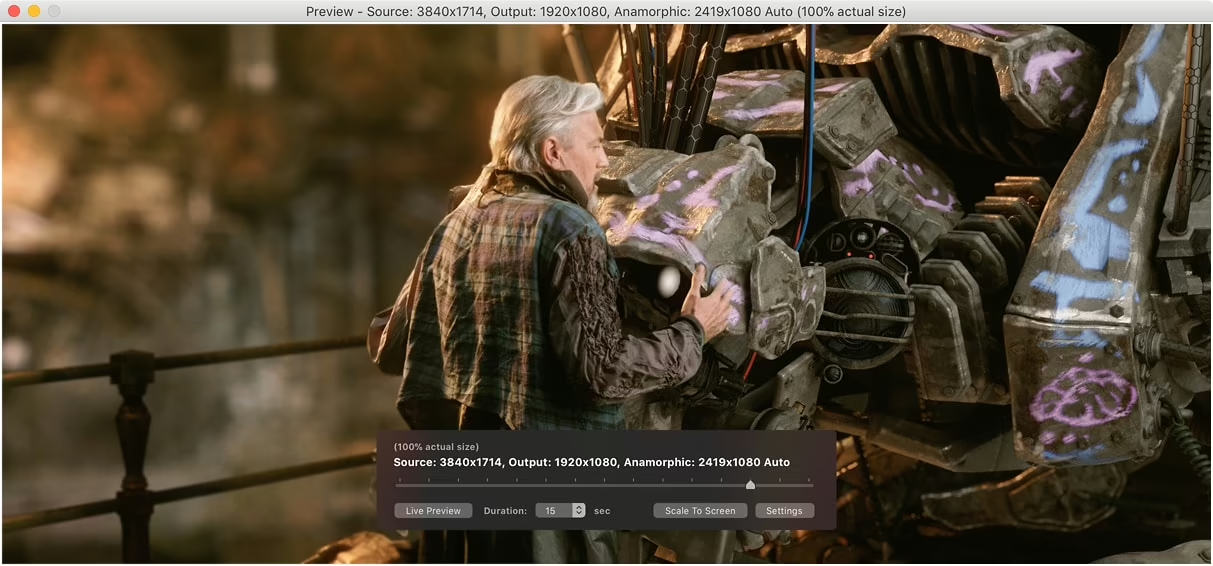
Before committing to a full encode, the Preview button renders a short sample with your exact settings. It is the fastest way to catch a wrong crop, a missing audio track, or an RF value you set with your elbow.
We cover more tools that treat quality as a first-class setting in our photo editing software guide, and the same test-first mindset applies there.
Every lever that moves file size, ranked
When a file lands too big, people reach for the quality dial first. Sometimes that is right. Often a different lever gets you there with less damage. Here is the order we work through.
- Resolution. Halving a 4K file to 1080p cuts the pixel count by 75 percent. On the Dimensions tab, check whether the output size matches where the file will actually be watched.
- Frame rate. Set the Video tab frame rate to Same as source with a peak cap. Turning 60 fps footage into 30 fps halves the frames the encoder must describe.
- Codec. Moving from H.264 to H.265 typically saves a large chunk of the file at equal quality – commonly cited savings land around a third to a half. AV1 goes further when you have encoding time to burn.
- Encoder preset. The speed slider on the Video tab runs from ultrafast to placebo. Each step slower buys a few percent of size at the same RF. Medium is the sweet spot; placebo is bragging rights.
- Quality (RF). Now touch the dial. Steps of 1 or 2, testing between changes.
- Audio. A stereo AAC track at 160 kbps is plenty for speech and most music. Keeping six-channel AC-3 passthrough on a phone video wastes a third of your file.
- Filters. Deinterlace and denoise only when the source needs them. Unneeded filters cost both size and detail.

A typical result from applying the levers in that order: a 10-minute 1080p60 screen recording that starts at 1.9 GB can land in the 250 to 400 MB range, with no visible loss on a desktop monitor. The exact number depends on the footage, so always test on your own files.
If file size problems usually start at recording time, our guide to screen recording on Mac with audio shows how to capture cleaner sources in the first place, and the screenshot apps we cover handle the still-image side of the same job.
Audio and subtitles without surprises
The Audio tab lists every track in the source and what HandBrake will do with it. The default re-encodes the first track to AAC stereo, which is what most players expect.
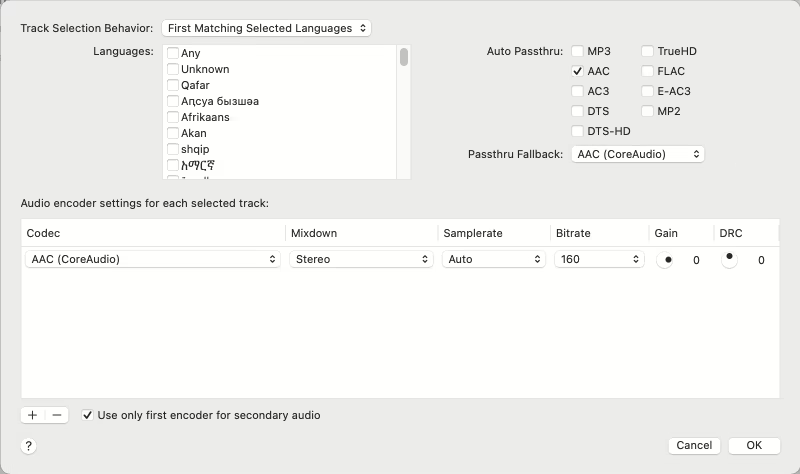
Passthrough copies a track without re-encoding: no quality loss, no size saving, no time spent. Use it when the source audio is already in a format your players accept, like AC-3 for a TV box or the original AAC from a phone recording. If capturing clean audio is where the chain starts, our Mac screen recording with audio guide covers that first step. Version 1.11 added PCM encoding and passthrough, which matters for the new Production and Preservation presets where uncompressed audio keeps the master generation-perfect.
A few audio defaults worth checking before a big batch:
- Set the track language and name so players label it correctly.
- Keep the sample rate on Auto unless a device demands otherwise.
- Version 1.11.2 fixed the Core Audio AAC encoder’s 7.1 channel layout, so surround encodes on Mac are safe to run again.
Subtitles live on the next tab. HandBrake can pass through text subtitles, burn them permanently into the picture, or import external SRT files. Burning is the only option that works on players with no subtitle support, but it is irreversible. The 1.11.2 release also fixed VobSub palette handling in MP4, which had been producing wrong subtitle colors.
Save, encode, and watch it work
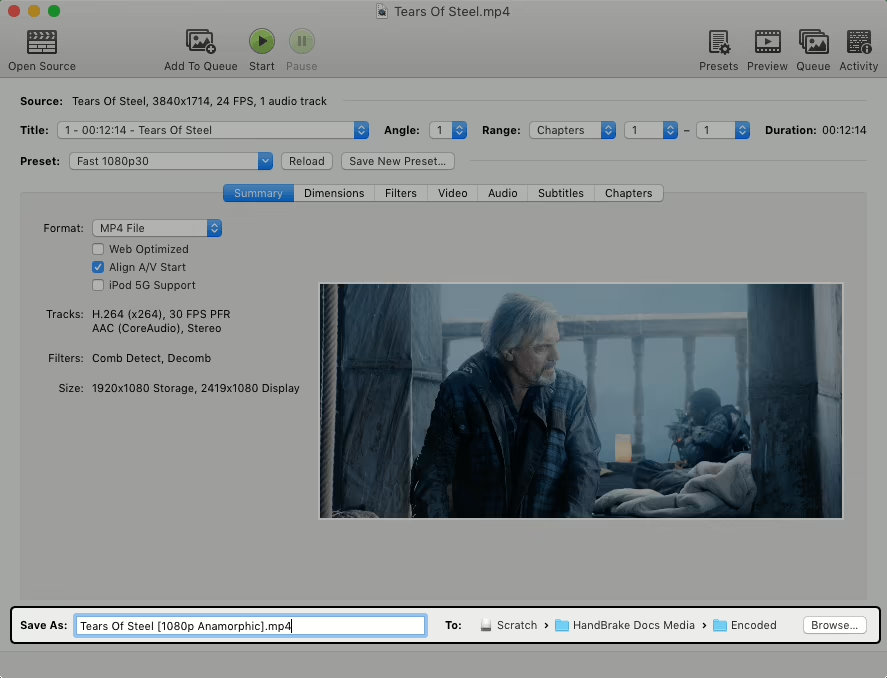
The Save As field at the bottom sets the destination file. HandBrake will not overwrite your source, but get into the habit of sending output to a separate folder anyway. If those output files matter, fold that folder into the backup routine from our incremental vs differential backup guide.
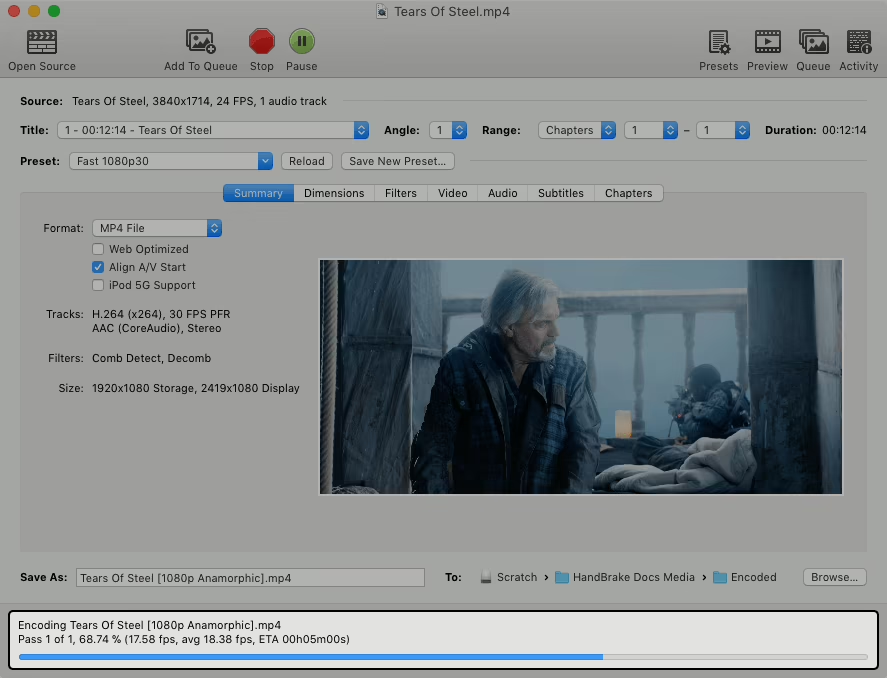
Hit Start and the progress bar at the bottom shows the encode in flight: percentage, current frame rate, average rate, and time remaining.
The queue and the command line
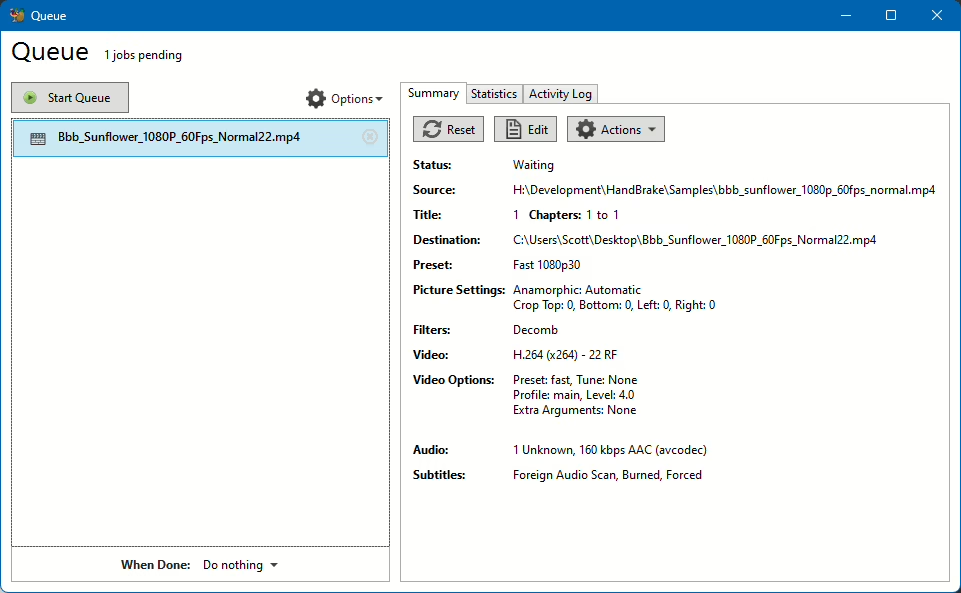
Everything above converts one title at a time. For a folder of files, the Queue is the tool. Set up a job, click Add to Queue, change the source or settings, add the next one, then start the whole stack and walk away.
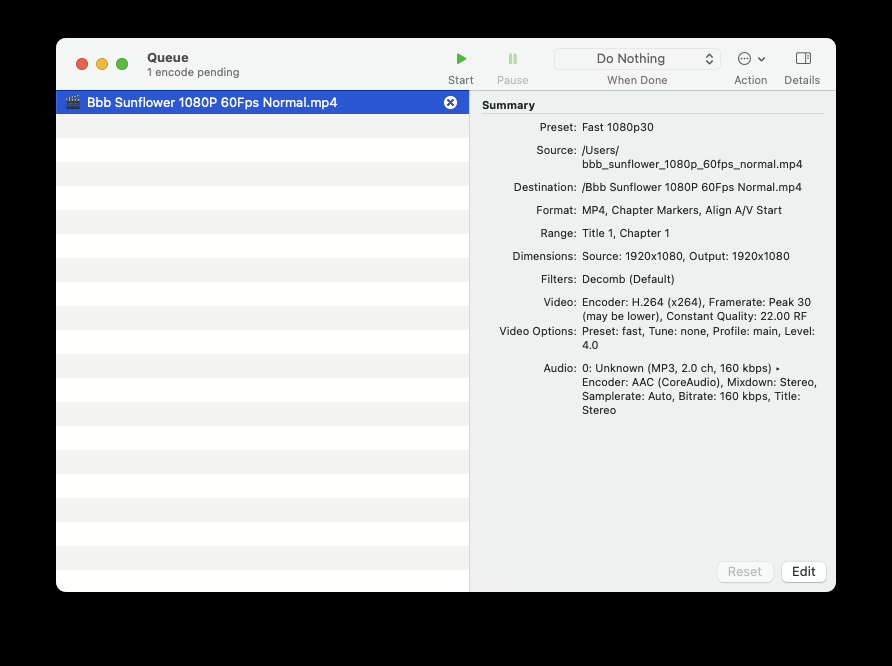
The queue window shows each pending job with its complete settings summary, so you can audit a batch before it runs. The When Done menu can shut the computer down after the last encode finishes, which is handy for overnight runs.
Windows users get the same queue with the same controls, just dressed in the Windows interface.
True automation lives in HandBrakeCLI, the command-line build that ships alongside the app. Every GUI setting maps to a flag, so a watched-folder script or a scheduled job can run the exact encode you tested in the interface. If scripted media cleanup is part of a bigger automation habit, our automation tools roundup covers the platforms that trigger jobs like this. Teams running a shared video pipeline usually track batches in a project tool too; our Trello alternatives and Notion alternatives comparisons sort that category.
What HandBrake will not do
HandBrake is a transcoder, and staying inside that lane is why it is good at it. A few walls to know before you plan around it:
- No editing. You can pick a title, a chapter range, or a point-to-point segment, but you cannot cut scenes, join clips, or add transitions. That is editor territory, and our video editing apps list is the place to look.
- No copy protection. Commercial DVDs and Blu-rays with DRM will not open. HandBrake’s developers have always kept decryption out of the project.
- No upscaling magic. Raising the output resolution above the source adds pixels without adding detail.
- No cloud. Everything runs on your machine, which is the privacy win, but a big batch ties up the computer doing it.
If your actual goal is making videos rather than converting them, the text-to-video AI generators we cover create footage from a prompt (our Veo 3 prompt guide shows how far that approach has come), and the whiteboard animation tools cover explainer-style output. HandBrake then slots in afterwards to shrink whatever those tools export. The AI tools we recommend for small business cover the wider stack if video is only one piece of it.
What is new in HandBrake 1.11
Version 1.11.0 landed in March 2026 and was bigger than a maintenance release. The highlights, straight from the official release notes:
- MOV container encoding for the first time, closing a long-standing gap for editing workflows.
- Production ProRes and DNxHR presets in MOV, including proxy resolutions at 2160p, 1080p and 540p with 24-bit PCM audio.
- Preservation FFV1 presets with FLAC and PCM audio for lossless archiving.
- AV1 VCN 2160p 4K preset for AMD 9000-series GPUs.
- PCM audio encoding and passthrough on all platforms.
- Windows now requires .NET Desktop Runtime 10.0 and drops the deprecated Intel HyperEncode.
Two point releases followed: 1.11.1 in March fixed a PCM scanning crash and dropped the leftover .NET 8 dependency, and 1.11.2 in June 2026 fixed two-pass crashes, a surround audio channel bug, and subtitle colors in MP4. If you are on 1.10 or older, the upgrade is worth the five minutes.
We track the rest of the apps we rely on over at our apps directory, and how we rank companies explains how we evaluate the tools that make our lists.
Pick a General preset at your source resolution, set RF to the default, and adjust in steps of 2 after a one-minute test encode. Use H.265 when storage matters, a hardware encoder when time matters, and the queue when volume matters. That workflow covers nearly every conversion job HandBrake will ever meet on your desk, and anything beyond it belongs to the editors in our video editing picks.
Frequently asked questions
Yes, completely. It is open-source software under the GPL license, maintained by volunteers. There are no watermarks, no trial limits, no paid tier, and no ads. The only cost is the time your computer spends encoding.
Yes, as long as you get it from the official site at handbrake.fr or the project’s official GitHub releases. Third-party download portals have bundled junk with popular free tools before, so skip them and go straight to the source.
Not by itself. HandBrake deliberately ships without any copy-protection removal, so most commercial discs fail to scan. It handles home movies, unprotected discs, and video files without issue.
Start at the preset default, usually RF 22 or 23 for x264. Drop by 2 if you see blocky artifacts in dark scenes; raise by 2 if files are too big. For x265 or AV1, add 2 to 4 points. Always test on a one-minute sample before a full encode.
Any H.264, H.265 or AV1 encode is lossy, so technically yes, but at sensible RF values the loss is invisible on normal screens. If you truly need zero loss, the Preservation FFV1 preset keeps every pixel at a much larger file size.
Yes. Open a folder as the source to scan everything at once, or add jobs one by one to the Queue. The queue runs the whole stack unattended and can even shut the PC down when it finishes. HandBrakeCLI does the same from scripts.
HandBrake, for anything bigger than a few seconds. Online converters upload your file to someone else’s server, cap sizes, throttle speed, and sometimes watermark the output. HandBrake keeps the file on your machine, has no size limits, and gives you far better quality control.






Leave a Reply